New User Subscription
Complete guide for first-time users selecting and subscribing to a Lenify plan.
Overview
The new user subscription flow is designed for users who don't have an active subscription and are choosing their first plan. This is a 3-step process with a visual progress indicator.
Step Flow
Step 1: Plan Selection
Interface Elements
Billing Cycle Toggle:
- Monthly: Standard pricing with monthly payments
- Yearly: 20% discount with annual commitment (displays "Save 20%" badge)
Available Plans:
Starter Plan - $10/month per user or $96/year per user
- 1 Project and 1 User (fixed at 1 user = $10 total cost)
- AI Powered Project Blueprints
- Project Blueprint driven development
- AI Powered Code Generation
- Automated Error Detection and Fixing
- Support Existing Projects
- AI Powered Code Refactoring
- Web Preview and GitHub Integration
- Community Support
Pro Plan - $20/month per user or $192/year per user** ⭐ Most Popular
- 5 Projects and up to 10 Users (cost scales: $20 × team size)
- All Starter features plus enhanced capabilities
- Priority AI processing
- Advanced debugging tools
- Priority support and team collaboration
Enterprise Plan - $30/month per user or $288/year per user**
- Unlimited Projects and up to 100 Users (cost scales: $30 × team size)
- All Pro features plus enterprise capabilities
- Advanced AI features and analytics
- Custom integrations and dedicated support
Action Buttons
Each plan card displays:
- "Get Started" button for new users
- Plan selection triggers transition to Step 2
Plan Comparison
| Feature | Starter | Pro | Enterprise |
|---|---|---|---|
| Projects | 1 | 5 | Unlimited |
| Users | 1 | Up to 10 | Up to 100 |
| AI Powered Project Blueprints | ✅ | ✅ | ✅ |
| Project Blueprint Driven Development | ✅ | ✅ | ✅ |
| AI Powered Code Generation | ✅ | ✅ | ✅ |
| Automated Error Detection and Fixing | ✅ | ✅ | ✅ |
| Support Existing Projects | ✅ | ✅ | ✅ |
| AI Powered Code Refactoring | ✅ | ✅ | ✅ |
| Web Preview and GitHub Integration | ✅ | ✅ | ✅ |
| Community Support | ✅ | ✅ | ✅ |
| Priority AI Processing | ❌ | ✅ | ✅ |
| Advanced Debugging Tools | ❌ | ✅ | ✅ |
| Priority Support and Team Collaboration | ❌ | ✅ | ✅ |
| Advanced AI Features and Analytics | ❌ | ❌ | ✅ |
| Custom Integrations and Dedicated Support | ❌ | ❌ | ✅ |
Step 2: Subscription Summary
Team Configuration
Starter Plan:
- Designed for individual developers with a fixed 1-user setup to keep costs simple and predictable
Pro Plan:
- Scale your team from 1-10 members based on your project needs
- Add team members now or start small and grow later
- Perfect for growing development teams who need flexibility
Enterprise Plan:
- Support large organizations with teams of 1-100 members
- Ideal for companies with multiple development teams or departments
- Enterprise-grade scalability for complex organizational structures
Pricing Transparency
This step shows you exactly what you'll pay before proceeding to payment:
- Clear Per-User Costs: See the individual cost per team member
- Real-Time Calculations: Watch your total update as you adjust team size
- Yearly Savings Breakdown: Understand exactly how much you save with annual billing
- No Hidden Fees: Your total subscription cost is transparent and predictable
Why This Step Matters
- Budget Planning: Know your exact monthly or yearly commitment before payment
- Team Sizing: Choose the right team size for your current needs
- Cost Optimization: Compare monthly vs yearly savings to maximize value
- Flexibility: Easily adjust team size to find the perfect fit for your organization
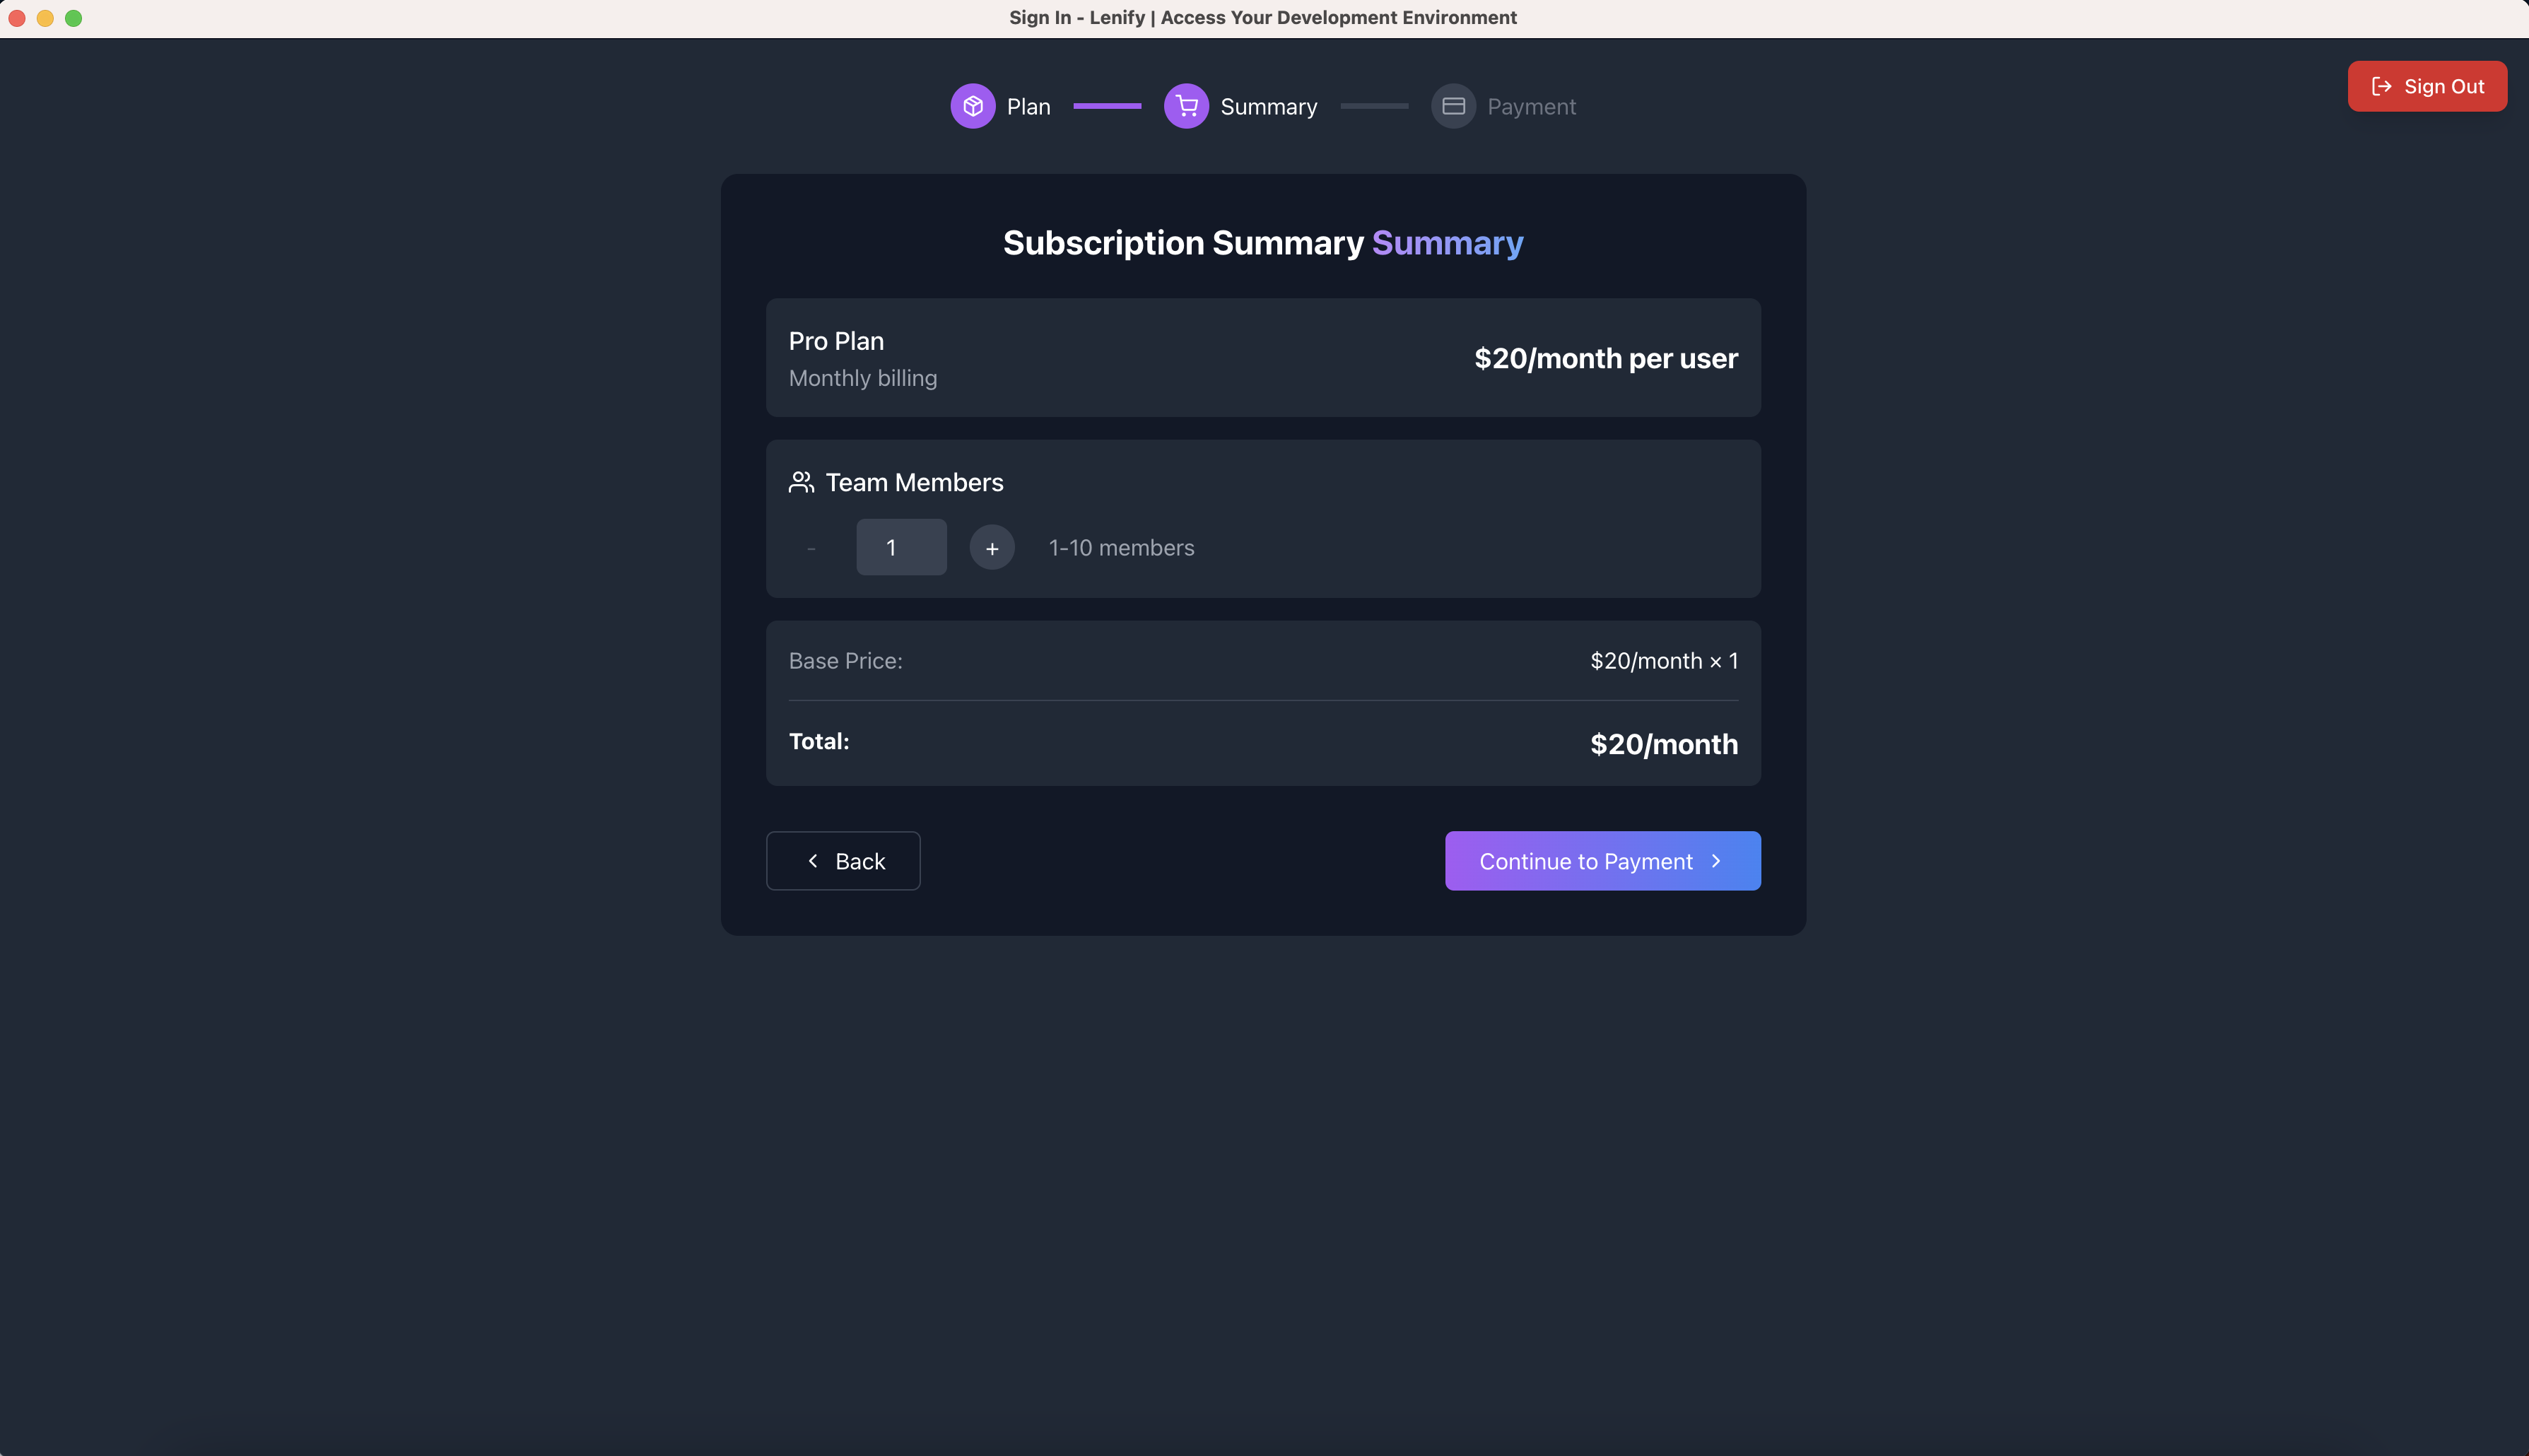 Step 2 interface showing team configuration, real-time pricing calculations, and subscription summary with clear cost breakdown
Navigation
- Back button → Returns to Step 1 (Plan Selection)
- Continue button → Proceeds to Step 3 (Payment Setup)
Step 3: Payment Setup
The payment process contains 3 sequential sub-sections:
Sub-Step 1: Customer Profile
Required Information:
- Customer Name: Full name for billing
- Address: Complete street address
- City: City name
- State: State/Province
- ZIP Code: Postal code
- Country: Dropdown with 195+ countries
Why We Need This Information:
- Accurate Billing: Ensure your subscription charges reach the correct address
- Tax Compliance: Calculate appropriate taxes based on your location
- Account Verification: Confirm your identity for account security
- Service Delivery: Enable proper service provisioning in your region
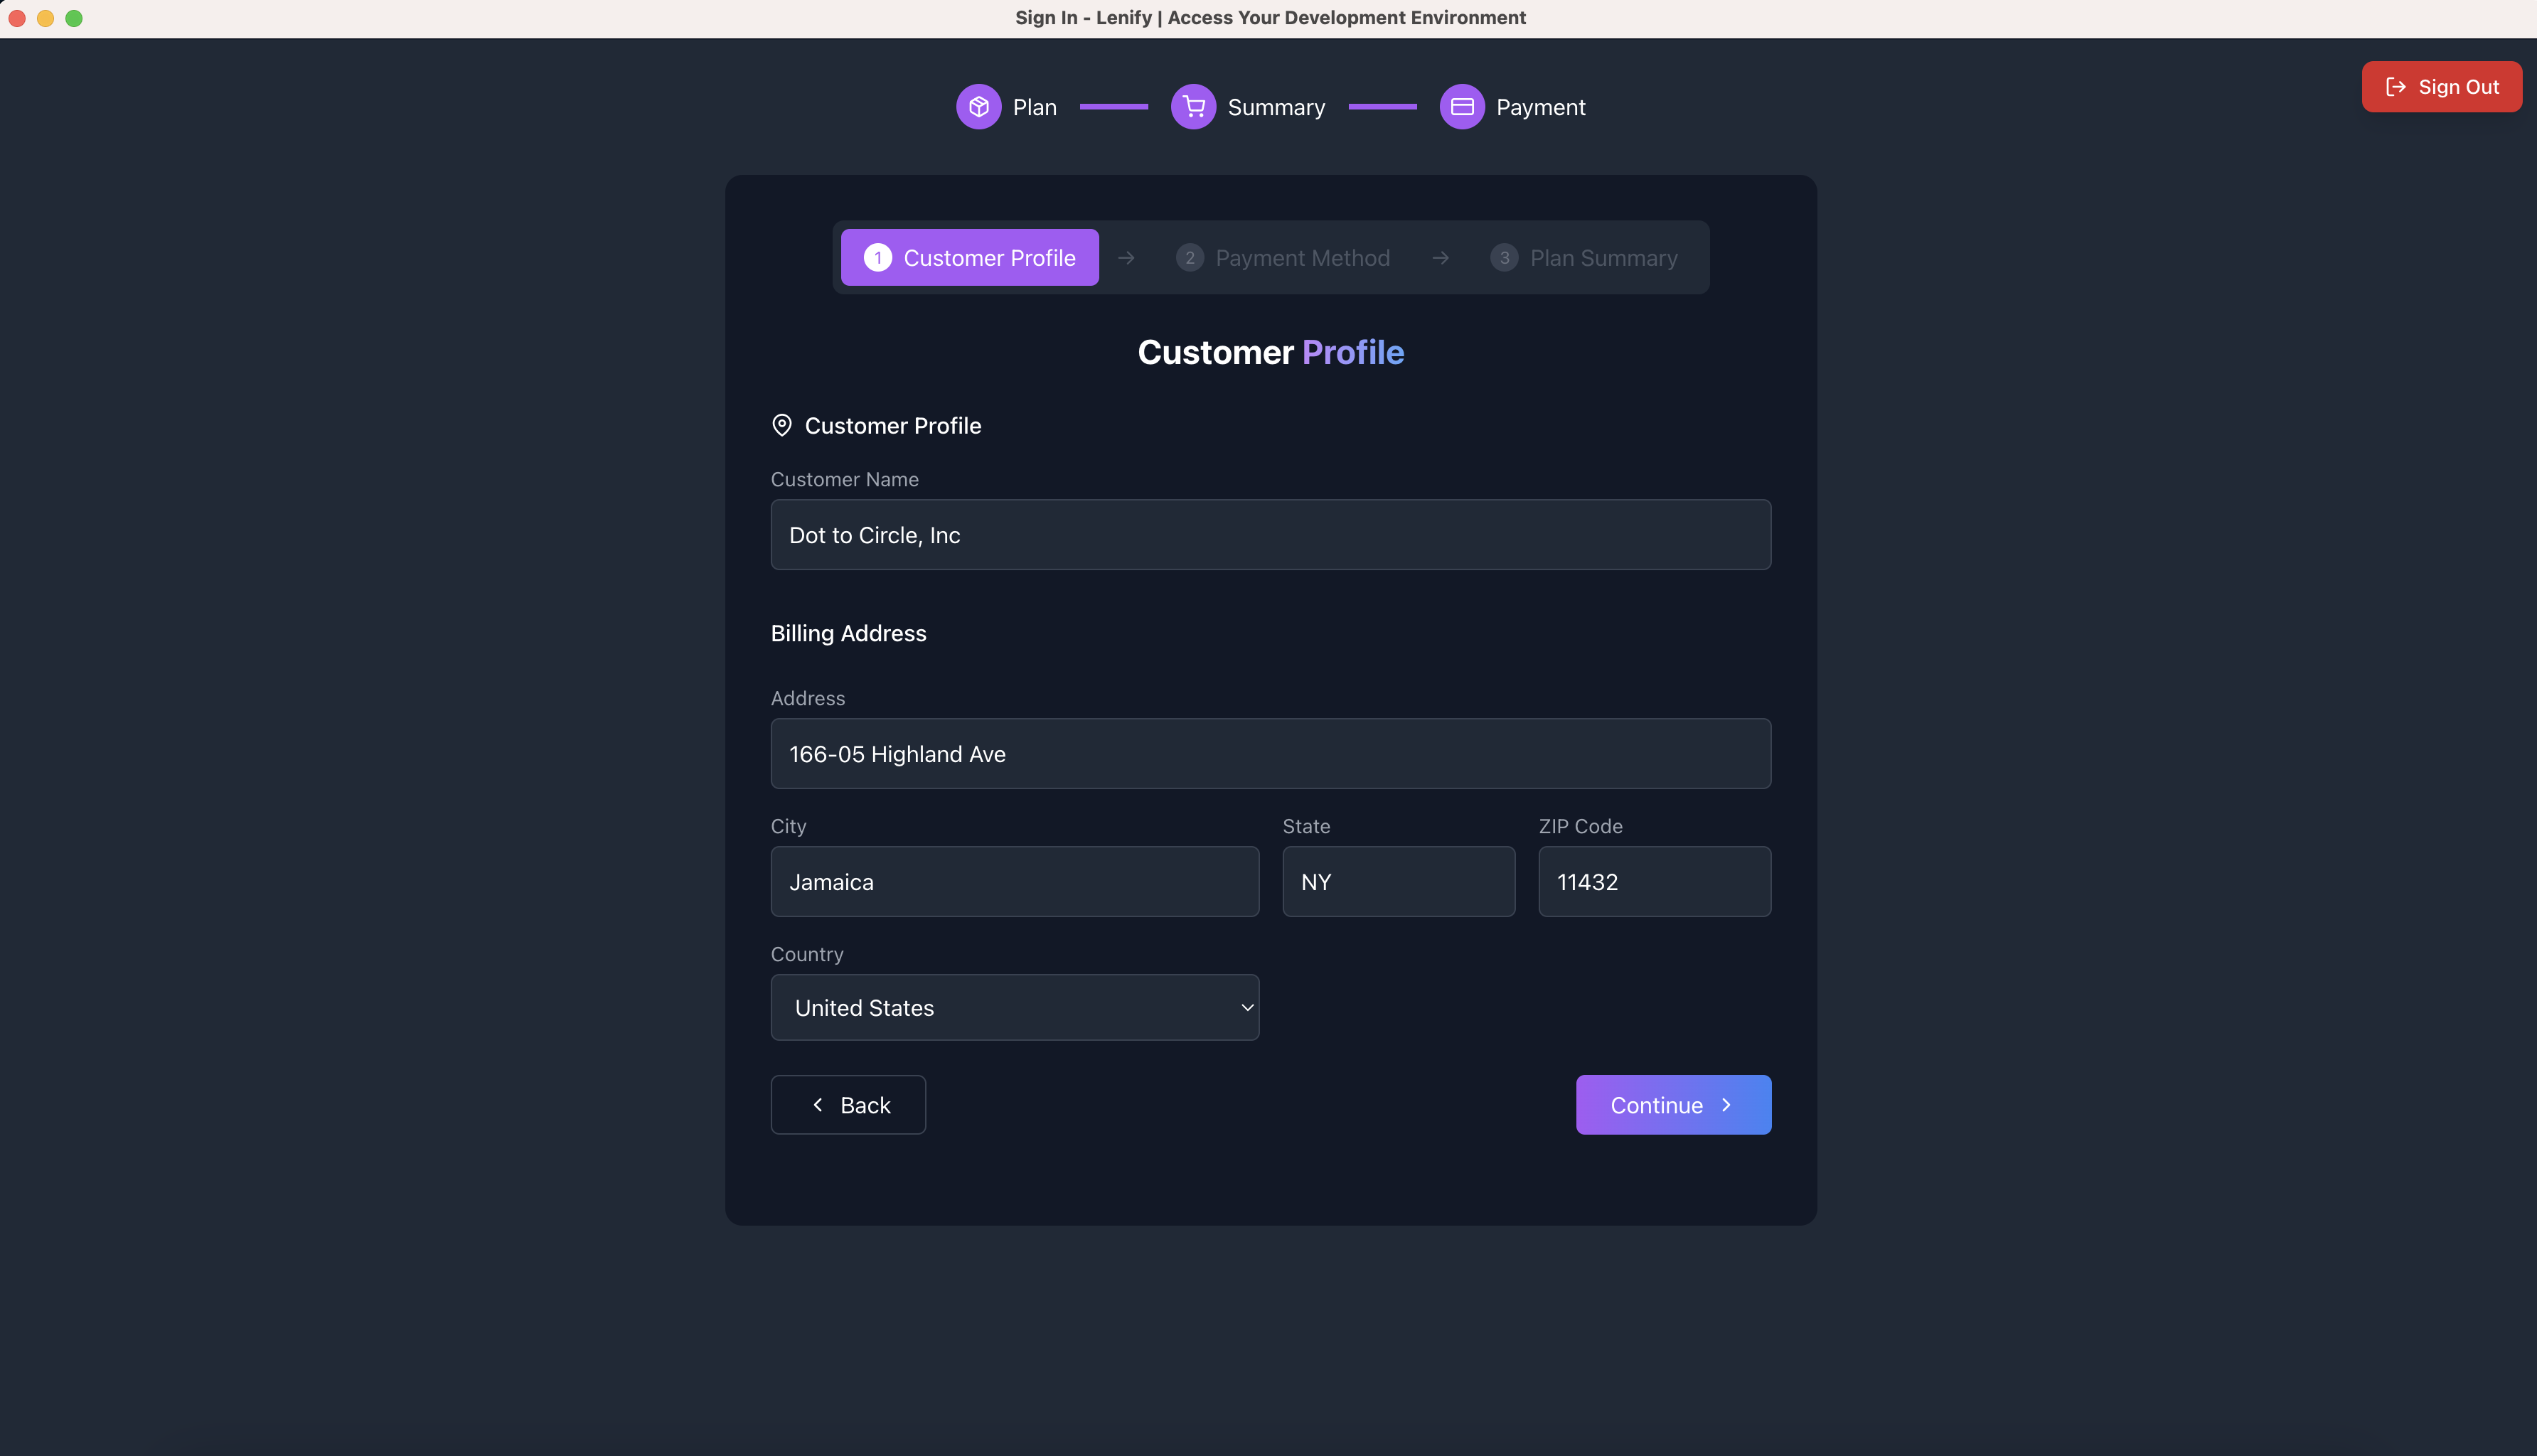 Sub-Step 1 customer profile form showing billing address fields with clean layout and validation
Navigation:
- Continue button → Proceeds to Sub-Step 2 after validation
Sub-Step 2: Payment Method
Payment Options:
For Users with Existing Payment Methods:
- Radio button selection from saved payment methods
- Card details display: brand icon, last 4 digits, expiration date
- Auto-selection of default payment method
For New Users (No Saved Methods):
- Stripe Elements card form automatically displayed
- Real-time card validation
- Secure PCI-compliant processing
New Card Form Fields:
- Card number with brand detection
- Expiration date (MM/YY format)
- CVC security code
- Cardholder name
Security Features:
- PCI-DSS compliance badges
- SSL encryption indicators
- Real-time fraud detection
- No local storage of payment data
 Sub-Step 2 payment method interface showing saved payment options and new card form with security features
Navigation:
- Back button → Returns to Sub-Step 1 (Customer Profile)
- Continue button → Proceeds to Sub-Step 3 after payment method selection
Sub-Step 3: Plan Summary & Subscription
Final Order Summary:
- Plan: Selected subscription name
- Billing Cycle: Monthly or Yearly
- Users: Final member count
- Price per User: Individual user pricing
- Yearly Savings: Discount amount (if applicable)
- Total Amount: Final subscription cost
Subscription Processing:
- Real-time payment authentication through Stripe
- Loading states with progress indicators
- Comprehensive error handling with user-friendly messages
- Success confirmation with redirect preparation
Final Action:
- Subscribe - $[Amount]/[period] button
- Processing states: "Authenticating Payment..." → Success message
- Automatic redirect to dashboard upon completion
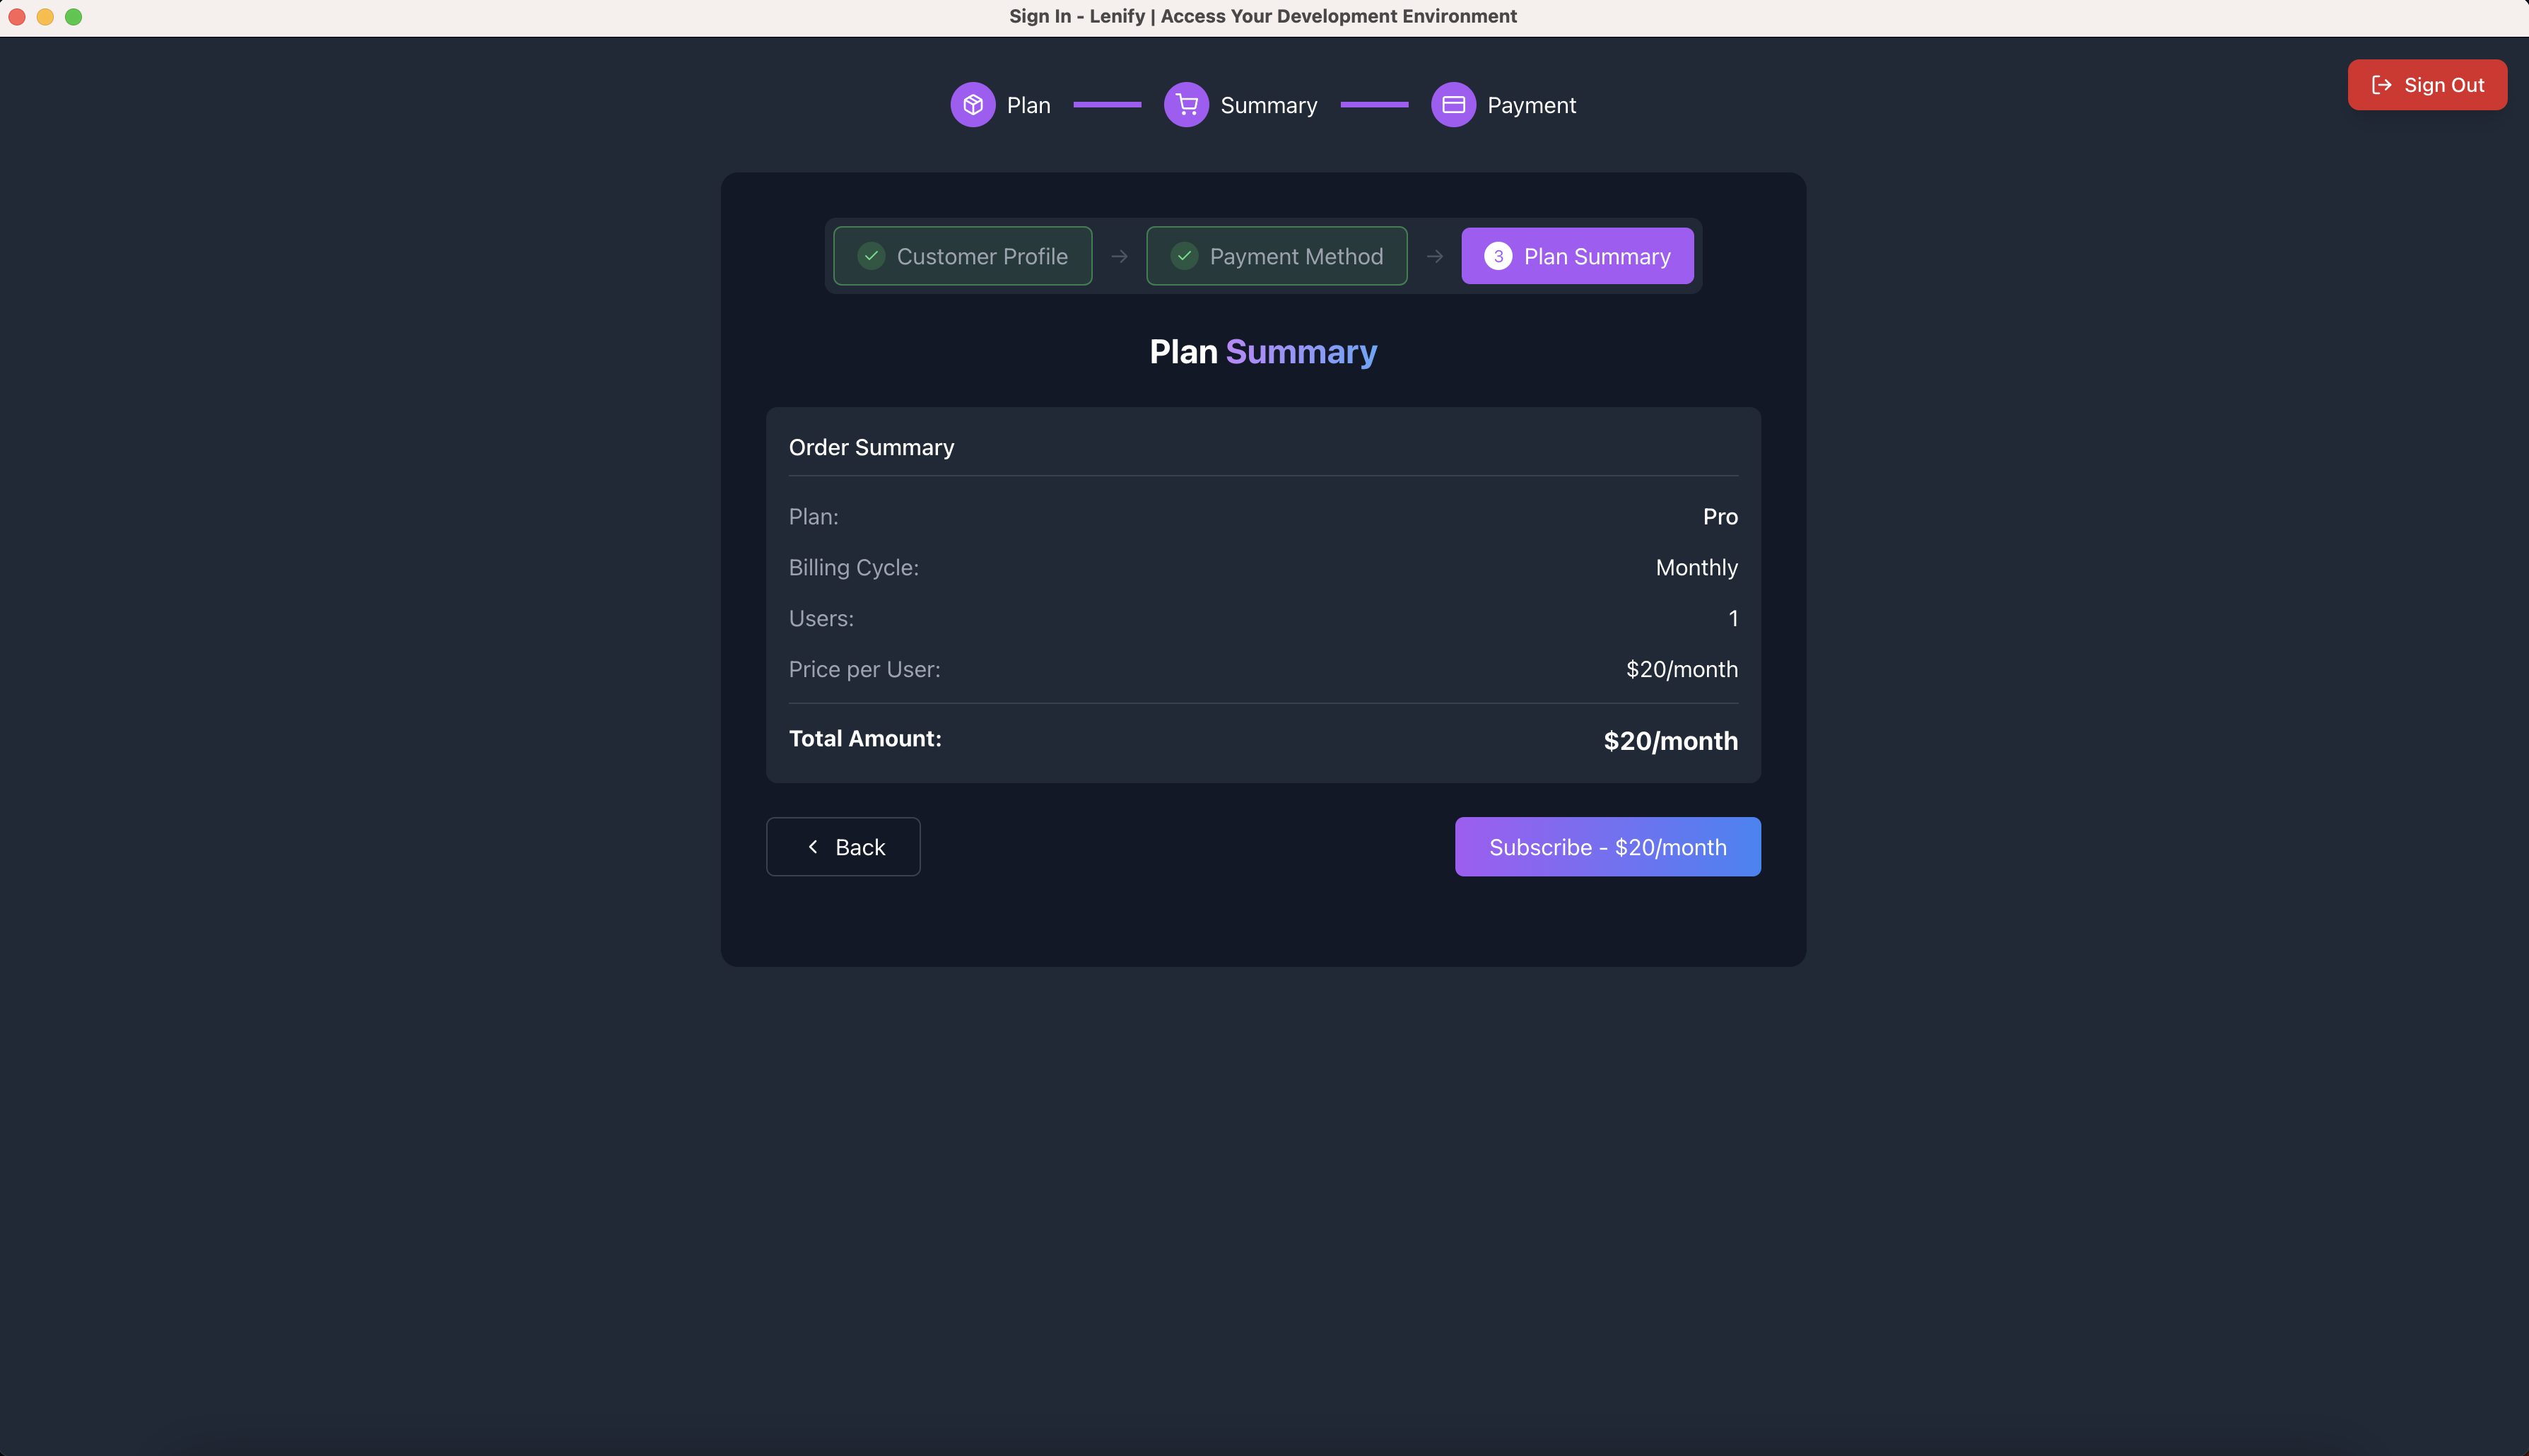 Sub-Step 3 final order summary and subscription processing interface with payment confirmation
Navigation:
- Back button → Returns to Sub-Step 2 (Payment Method)
- Subscribe button → Completes subscription creation
Post-Subscription
Automatic Actions
Upon successful subscription creation:
- Immediate Activation: Subscription becomes active instantly
- Dashboard Redirect: Automatic navigation to
/dashboard - Success Notification: Confirmation message display
- Feature Unlock: All plan features immediately available
- Usage Tracking: Real-time monitoring activation
Next Steps
- Access development workspace
- Create first project
- Explore AI-powered features
- Invite team members (Pro/Enterprise plans)
- Configure account preferences
Navigation Flow Summary
Related Documentation
Continue to:
- Plan Upgrade - For upgrading existing subscriptions
- Add Team Members - For scaling team size
- Billing Setup - For ongoing billing management
- Dashboard Overview - To begin using Lenify